 English
Blog
What is Arduino and How to use it in a project?
If you’ve ever searched “what is Arduino”, chances are you’re curious about how this powerful little board can turn your ideas into real, working projects.
And you’re not alone. Arduino has become one of the most popular platforms for those who want to dive into the world of electronics , whether you’re a curious beginner or a seasoned developer.
In this guide, you’ll learn what Arduino is, how it works, the different types of boards available, and how you can use it to build everything from smart home devices to robotics and interactive systems.
We’ll even show you how to level up your project with professional-grade user interfaces using technologies like Proculus UART TFT LCD Modules.
Let’s explore how Arduino makes innovation more accessible, and more powerful, than ever before.
 As an open-source platform, Arduino also has several versions on the market, with different prices and specific applications.
Arduino boards vary according to a project’s complexity and the number of ports required.
There are more basic options, like the Arduino Uno, and also those aimed at complex projects, like the Arduino Due.
We have listed the main types of Arduino and the details of each one for you. Check them out:
As an open-source platform, Arduino also has several versions on the market, with different prices and specific applications.
Arduino boards vary according to a project’s complexity and the number of ports required.
There are more basic options, like the Arduino Uno, and also those aimed at complex projects, like the Arduino Due.
We have listed the main types of Arduino and the details of each one for you. Check them out:
 Creating with Arduino is a powerful way to bring your ideas to life, quickly, flexibly, and affordably. Whether you’re developing a prototype or a finished product, Arduino provides a reliable platform to streamline the process and spark innovation.
What is Arduino?
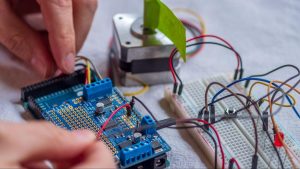
Arduino is an open-source electronics platform consisting of both hardware and software components. The hardware includes a microcontroller board with digital and analog input/output pins, while the software provides an integrated development environment (IDE) for programming the board. Its software is developed using C/C++ based language within a graphical environment written in Java. Therefore, Arduino programming does not require extra equipment besides a USB cable. It allows infinite modifications, according to the needs of each user. Once programmed, the Arduino can be used independently on any object, such as fans, controls, and thermometers. This means that starting from the same basic hardware, anyone can assemble, modify and customize the Arduino.How did Arduino come about?
Arduino was created in 2005, in Italy, by a team of 5 innovators : Massimo Banzi, David Cuartielles, Tom Igoe, Gianluca Martino and David Mellis. Banzi wanted to teach his students the basics of electronics and programming, but he couldn’t find affordable boards and simplified schematics. The goal was to develop an adaptable, low-cost tool that could serve as the foundation for interactive educational projects. Arduino’s user-friendly approach and innovative features quickly gained popularity, leading to widespread adoption in both educational and professional settings. With innovative features, the Arduino became popular in its first years of existence, selling more than 50,000 units. In 2010, a documentary was also released showing the development trajectory of open-source boards. The platform’s success has been remarkable, with millions of boards sold worldwide and a thriving global community of makers, educators, and engineers contributing to its continuous development.What is Arduino for?
Arduino is an embedded physical computing platform. It is a dedicated and independent mini computer, programmed to perform certain functions. Because of this, anyone can develop different projects with Arduino, such as:Consumer Electronics
- Smart home automation systems
- Environmental monitoring devices
- Wearable technology prototypes
- Interactive art installations
Educational Projects
- Robotics platforms for learning
- Sensor-based experiments
- Programming tutorials
- STEM education tools
Industrial Applications
- Process monitoring systems
- Data logging devices
- Control system prototypes
- IoT sensor networks
Creative Projects
- Interactive sculptures
- Musical instruments
- Game controllers
- Light displays
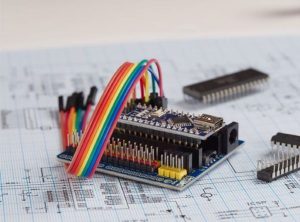
Different types of Arduino boards
As an open-source platform, Arduino also has several versions on the market, with different prices and specific applications.
Arduino boards vary according to a project’s complexity and the number of ports required.
There are more basic options, like the Arduino Uno, and also those aimed at complex projects, like the Arduino Due.
We have listed the main types of Arduino and the details of each one for you. Check them out:
Arduino Uno
One of the most popular open-source board models, the Arduino Uno was the first to feature a USB. In general, it is widely used for projects that require a smaller number of ports and has great compatibility with existing shields on the market.- Microcontroller:ATmega328P
- Digital I/O Pins:14 (6 PWM-capable)
- Analog Input Pins: 6
- Clock Speed: 16 MHz
- Memory: 32 KB Flash, 2 KB SRAM
- Power: USB or external adapter (7-12V)
Arduino Mega 2560
The Arduino Mega is the largest version of the Arduino board, ideal for more elaborate projects.- Microcontroller: ATmega2560
- Digital I/O Pins: 54 (15 PWM-capable)
- Analog Input Pins: 16
- Clock Speed: 16 MHz
- Memory: 256 KB Flash, 8 KB SRAM
- Serial Ports: 4 hardware serial interfaces
Arduino Leonardo
The Leonardo features integrated USB communication, making it unique among Arduino boards:- Microcontroller: ATmega32u4
- Digital I/O Pins: 20 (7 PWM-capable)
- Analog Input Pins: 6
- Clock Speed: 16 MHz
- Special Feature: Can emulate keyboard/mouse input
Arduino Due
The Arduino Due is, among the types of Arduino, the board with the highest processing capacity.- Microcontroller: 32-bit ARM Cortex-M3
- Digital I/O Pins: 54 (12 PWM-capable)
- Analog Input Pins: 12
- Clock Speed: 84 MHz
- Memory: 512 KB Flash, 96 KB SRAM
- Operating Voltage: 3.3V
Arduino Nano
The Arduino Nano, when in version 3.x, is a compact board based on the ATmega328 microcontroller. When in version 2.x, it has the ATmega168 as a microcontroller.- Microcontroller: ATmega328P
- Digital I/O Pins: 14 (6 PWM-capable)
- Analog Input Pins: 8
- Clock Speed: 16 MHz
- Connection: Mini-USB
- Size: 45mm × 18mm
Arduino Pro Mini
The Arduino Pro Mini compact board is ideal for permanent projects, that is, where there is no need for constant updating or high processing power.- Microcontroller: ATmega328P
- Digital I/O Pins: 14 (6 PWM-capable)
- Analog Input Pins: 6
- Clock Speed: 8 MHz (3.3V) or 16 MHz (5V)
- Programming: Requires external programmer or FTDI adapter
Arduino Esplora
Totally different physically from other Arduino boards, the Arduino Esplora has several sensors.- Microcontroller: ATmega32u4
- Built-in Components: Joystick, buttons, slider, temperature sensor, accelerometer, microphone, buzzer, RGB LED, light sensor
- LCD Connector: Built-in socket for displays
- Clock Speed: 16 MHz
How does Arduino work?
Arduino lcd module products work from programming codes intended for the most diverse types of functions. Its programming is done through the Arduino IDE program, available for free on the official Arduino website. This is the space where you can type the program, test for errors, and transfer it to the open-source device. Initially, you need to connect the Arduino to a computer using a USB cable. With the open IDE, you can start a program using the basic Arduino structure, made up of two blocks: setup Program location where initial options are configured. In setup, you must determine the initial values of a variable and write messages to the user. Systematic evaluation will be of interest to health policy researchers. In addition, it is also in setup where you must define whether a port will be used as input or output. At the beginning of the Arduino program structure, it is important to put a note with the name of the program, its function and the creator’s name.What are the benefits of using Arduino to create projects?
Here are the main benefits of using Arduino to create projects:- Rapid prototyping with minimal setup: Quick setup and programming enable fast iteration and testing of ideas.
- Extensive community support: Large user base provides tutorials, libraries, and troubleshooting support.
- Open-source flexibility: Complete access to hardware designs and software source code allows unlimited customization.
- Ideal for both beginners and experienced developers: Simplified programming language makes it easy for beginners and its robust platform makes it suitable for industrial and commercial applications
- Seamless integration with a wide range of sensors and module: Vast ecosystem of compatible sensors, actuators, and expansion shields.
How to use Arduino in your project?
Creating with Arduino is a powerful way to bring your ideas to life, quickly, flexibly, and affordably. Whether you’re developing a prototype or a finished product, Arduino provides a reliable platform to streamline the process and spark innovation.
1. Define the purpose
Start by clearly identifying what your project is intended to do. Whether it’s automating a task, collecting data, or interacting with users, a defined goal will guide every decision moving forward. Define what inputs and outputs are needed, what performance requirements must be met, and what are the size and power constraints.2. Choose the right Arduino board
Select an Arduino board that fits your project’s requirements. Consider factors like I/O pins, connectivity (e.g., Wi-Fi, Bluetooth), and processing power.3. Gather components
List and source all necessary electronic components, sensors, actuators, displays, and power supplies. Ensure compatibility with your Arduino board.4. Write the code
Develop your program using the Arduino IDE. Start with basic functionality and add features incrementally. Keep your code modular and well-documented to make testing and debugging easier.5. Upload and test
Connect your Arduino to your computer, upload the code, and begin testing each part of your project. Verify that all components behave as expected.`6. Refine and integrate
After initial testing, refine your design. Improve performance, enhance stability, and neatly integrate your components for a final, professional build.Get Smarter Interfaces with Proculus Technologies Proculus Technologies
Designing user interfaces for embedded systems doesn’t have to be time-consuming or complex. At Proculus Technologies, we empower engineers, developers, and product teams to create advanced, user-friendly graphical interfaces with ease. Our UART TFT LCD Modules are built for performance and simplicity. With a built-in graphics processor and a user-friendly development environment (UnicView Studio), you can design, simulate, and deploy rich touch-based interfaces — without needing to write complex graphics code or manage low-level display drivers. Whether you’re building industrial machines, medical equipment, consumer devices, or automation systems, Proculus modules provide a plug-and-play solution that dramatically shortens your development cycle. You focus on the functionality; we’ll handle the interface. Explore Proculus UART TFT LCD Modules! Start building better interfaces, faster!Conclusion
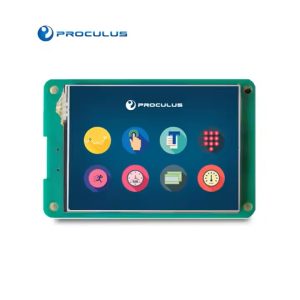
Now that you know what Arduino is and how it opens the door to powerful embedded applications, it’s time to take your projects one step further with smarter, more sophisticated user interfaces. At Proculus Technologies, we provide UART TFT LCD Modules that make it easy to add sleek, touch-enabled displays to your Arduino-based or professional-grade systems. With our intuitive development tools and robust hardware, you can go from prototype to polished product faster than ever. Why settle for basic screens or clunky interfaces? Our modules are built to help you create modern, responsive HMIs without deep graphics programming. Whether you’re a hobbyist looking to enhance your first project or an engineer working on a commercial product, Proculus helps bridge the gap between concept and execution. Bring your ideas to life—with clarity, speed, and confidence. Choose Proculus Technologies, and build smarter from the very first touch.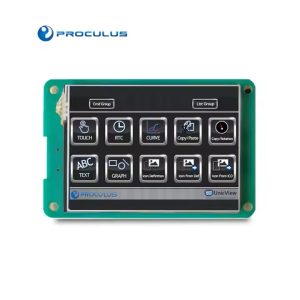
PHP Code Snippets Powered By : XYZScripts.com