English
How to choose the right HDMI Display for your engineering project

Selecting an HDMI display for an engineering project is crucial, for it affects mechanical design, power budgeting, signal integrity, user experience, compliance, and long-term maintainability.
For prototypes, a generic monitor may be enough. For production-ready systems, however, engineers need an HDMI display that is reliable, easy to integrate, electrically stable, mechanically practical, and available for the full lifecycle of the device.
This guide explains how to evaluate HDMI displays for industrial automation panels, embedded systems, medical equipment, outdoor kiosks, and SBC-based projects using platforms such as Raspberry Pi or NVIDIA Jetson. Keep reading!
What is an HDMI Display?
An HDMI display is a screen module or monitor that receives video and audio signals through the HDMI interface.
In engineering applications, an HDMI display is often used as the visual interface for a single-board computer, embedded controller, industrial PC, mini PC, or application processor.
Unlike a consumer TV or desktop monitor, an engineering-grade HDMI display must be evaluated as a component inside a larger system.
That means engineers need to consider mounting structure, touch interface, enclosure compatibility, thermal behavior, power input, cable routing, and long-term supply.
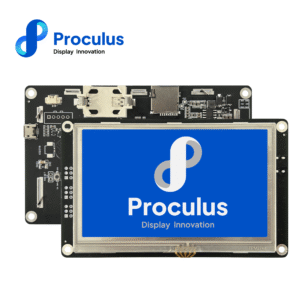
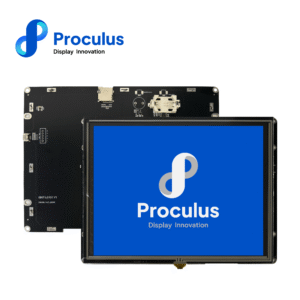
Proculus HDMI display modules are designed for projects that need practical integration, responsive touch performance, wide viewing angles, and compatibility with platforms such as Raspberry Pi, mini PCs, Windows, Linux, Android, and macOS systems.
Looking for an HDMI display module for your next embedded project? Explore Proculus HDMI Display solutions here!How does a HDMI Display Works?
An HDMI display receives a digital video signal from a host device through an HDMI cable. The host device generates the graphical output, while the display module converts the incoming signal into the image shown on the LCD panel.
In a typical embedded system, the architecture includes four main elements:
- Host processor or computer — such as a Raspberry Pi, Jetson, industrial PC, or custom board;
- HDMI signal path — cable, connector, and internal display controller;
- LCD panel — the physical display that presents the visual interface;
- Touch interface — usually connected through USB, micro USB, or USB Type-C, depending on the module.
For engineers, the key point is that HDMI simplifies video integration. Instead of designing a custom display interface from the PCB level, teams can use a standard video output and focus more development effort on the application, UI, enclosure, and system validation.
Why is HDMI Display selection a critical engineering decision?
A display is one of the most visible parts of a device, but it is also one of the most failure-sensitive.
A poor display choice can create issues that appear late in development, such as flickering, touch latency, unstable signal transmission, EMI problems, unreadable outdoor performance, mounting misalignment, or unexpected end-of-life risk.
For engineering teams, the HDMI display should be selected early in the product design cycle. The display affects:
- Front panel dimensions
- Enclosure depth
- Power supply design
- Cable routing
- Heat dissipation
- UI layout
- User interaction
- Regulatory testing
- Field maintenance
- Procurement planning
A display that works during bench testing may still fail in the real operating environment. That is why the right HDMI display is not simply the one that turns on. It is the one that performs reliably inside the complete system.
What to consider when choosing your HDMI Display
Before comparing part numbers, engineers should define the functional, mechanical, electrical, and environmental requirements of the project.
The best HDMI display is the one that fits the application conditions, not only the visual preference of the development team.
Mechanical integration
Mechanical fit should be evaluated before finalizing the enclosure. Check the screen size, active area, outline dimensions, mounting points, bezel requirements, connector position, and cable exit direction.
For open-frame designs, confirm that the display can be mounted securely without applying stress to the LCD panel. For touch applications, make sure the cover lens, bezel, gasket, and enclosure tolerances do not interfere with touch accuracy.
A display that looks correct on a datasheet may still be difficult to install if the connector location conflicts with internal boards, heat sinks, brackets, or cable routing.
Electrical integration
Electrical integration includes power input, HDMI signal quality, grounding, cable length, connector durability, and touch interface requirements.
Engineers should verify:
- Input voltage and current requirements
- Power connector type
- HDMI connector orientation
- Touch interface type
- Grounding strategy
- Cable shielding
- ESD protection
- EMI sensitivity
- Startup behavior after power cycling
The display should be tested with the final host device, final cable length, and expected power supply. Many display issues are not caused by the panel itself, but by unstable power, poor cable quality, weak grounding, or inconsistent host output settings.
Software & driver support
HDMI reduces driver complexity because the video signal is usually handled by the host system. However, software validation is still necessary.
Confirm that the host system supports the target resolution, refresh rate, orientation, scaling behavior, and touch mapping. If the project uses Linux, Android, or a customized OS image, test boot behavior, display detection, power recovery, and UI scaling.
For touchscreen projects, validate touch calibration, multi-touch behavior, wake-from-sleep behavior, and input stability after long operating periods.
Common mistakes engineers make when selecting HDMI displays
Many HDMI display problems appear because teams select a screen too late or treat it as a commodity component. The following mistakes are common in engineering projects and can increase redesign cost.
Choosing based only on price
A lower-cost display may be acceptable for a prototype, but it can become expensive if it creates mechanical rework, unstable touch performance, poor availability, or weak documentation.
For production projects, evaluate total integration cost, not only unit price. A reliable HDMI display with better support, documentation, and lifecycle stability can reduce engineering time and field risk.
Ignoring EMI compliance
HDMI cables can become a source of electromagnetic interference if the system is not properly designed. Long cables, poor shielding, weak grounding, and noisy power supplies can create signal stability problems and compliance failures.
Engineers should evaluate cable routing, grounding, shielding, enclosure design, and test requirements early in the design process. EMI should not be treated as a final-stage problem.
Underestimating sunlight readability
Brightness, contrast, viewing angle, cover glass, and surface reflection all affect readability. A display that looks excellent indoors may be difficult to read near windows, outdoors, or under strong factory lighting.
For kiosks, outdoor panels, medical carts, or control systems in bright environments, engineers should test real ambient lighting conditions before approving the display.
Not validating cable length limits
HDMI signal quality depends on cable length, cable construction, connector reliability, and the output strength of the host device. Longer cables can introduce signal loss, flicker, intermittent detection, or resolution negotiation issues.
Always test the exact cable length and routing planned for the final product. If the cable passes near motors, power supplies, relays, or other noisy components, additional validation is required.
Ignoring long-term availability (EOL risk)
A display is not easy to replace after mechanical design, UI layout, and compliance testing are complete. If the display reaches end-of-life unexpectedly, the product may require enclosure changes, software adjustments, or requalification.
For production systems, engineers should discuss lifecycle expectations, replacement models, and customization options before committing to a display.
How to choose an HDMI display based on application needs?
The right HDMI display depends on where and how the product will be used. A compact embedded controller, a medical device, and an outdoor kiosk may all use HDMI, but their engineering priorities are very different.
Industrial automation panel
For industrial automation, prioritize reliability, mounting stability, touch responsiveness, EMI performance, and long-term operation. The display should tolerate continuous use and integrate cleanly into control cabinets, machine panels, or operator terminals.
Medical diagnostic equipment
For medical and healthcare-related equipment, the display must support precise visual communication, stable operation, and easy cleaning integration.
Depending on the device, engineers may need to consider brightness, viewing angle, touch accuracy, enclosure hygiene, and regulatory requirements.
Outdoor kiosk
Outdoor and semi-outdoor kiosks need displays that remain readable under high ambient light and reliable across changing environmental conditions.
The engineering challenge is not only the display panel, but the complete system: enclosure, cover glass, sealing, ventilation, and power stability.
Embedded SBC projects (Raspberry Pi / Jetson)
For Raspberry Pi, Jetson, and other SBC-based systems, HDMI displays are often selected because they simplify video output and accelerate development.
When Should You Consider a Custom HDMI Display?
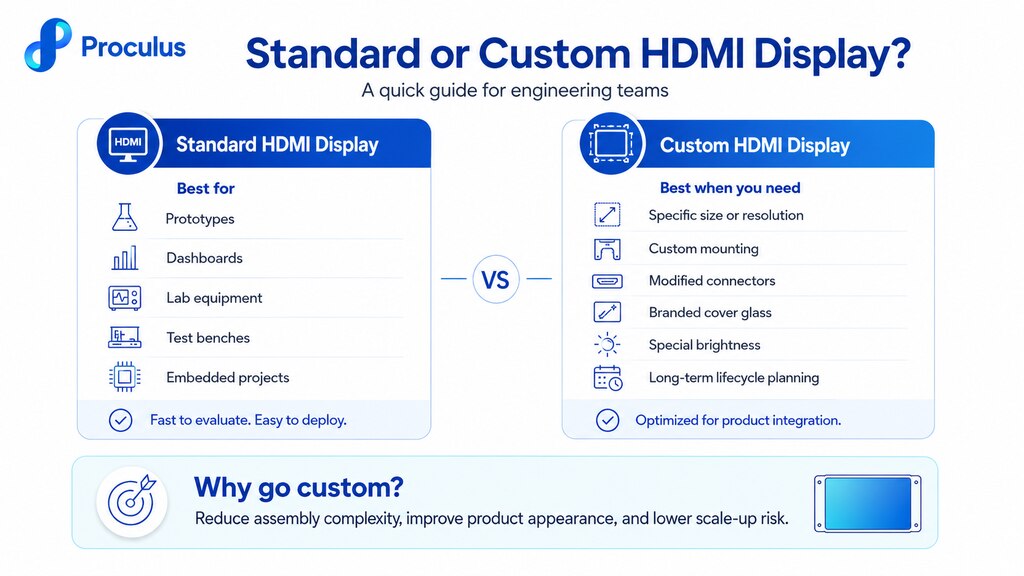
A standard HDMI display is often suitable for prototypes, dashboards, lab equipment, test benches, and many embedded projects. However, custom HDMI display development may make sense when the display becomes a strategic part of the product design.
Consider a custom HDMI display when you need:
- A specific screen size or resolution
- Custom mounting holes or mechanical outline
- Modified connector position
- Branded cover glass
- Special brightness or viewing requirements
- Custom touch panel structure
- Longer lifecycle planning
- Specific cable, power, or interface configuration
- Better fit with a production enclosure
Customization can reduce assembly complexity, improve product appearance, and lower risk during scale-up from prototype to production.
Count on Proculus for HDMI display solutions
Proculus develops HDMI display modules for engineering teams that need more than a basic screen.
With multiple display sizes, responsive touch options, open-frame structures, and compatibility with embedded and industrial platforms, Proculus helps product teams integrate reliable visual interfaces faster.
Whether you are building an automation panel, a smart terminal, a medical device interface, a kiosk, or an SBC-powered product, Proculus can support your project with practical HDMI display options and engineering-oriented guidance.
Explore Proculus HDMI Display solutions and find the right module for your next project!FAQ: HDMI Display
How do I get my screen to show on HDMI?
First, confirm that the display is powered on and the HDMI cable is fully connected to both the host device and the display. Then select the correct HDMI input, restart the host device, and verify that the output resolution and refresh rate are supported by the display.
For embedded systems, also check the boot configuration, operating system display settings, cable quality, and power supply stability. If touch is used, remember that the touch interface may require a separate USB connection.
Can you connect a ThinkPad to a monitor?
Yes. Most ThinkPad laptops can connect to an external monitor through HDMI, USB-C, Thunderbolt, DisplayPort, or an adapter, depending on the model.
After connecting the monitor, use the display settings in Windows or Linux to duplicate, extend, or select the external screen.
For engineering benches, a ThinkPad can also be used to test HDMI display behavior, resolution scaling, and UI layout before the display is connected to the final embedded platform.
How to put TCL TV on HDMI?
Use the TCL remote control to open the input or source menu, then select the HDMI port connected to your device. Make sure the external device is powered on and the HDMI cable is connected securely.
For product development, the same principle applies: the host device must output a compatible HDMI signal, and the display must be configured to receive it correctly.